Gosh, it's been so long since I've blogged, I've almost forgot how... But here goes--our daughter, a 2011 graduate of James Madison University, has been living locally and working as an entertainer for a theatre for the past two years, touring across the U.S. Upon receiving admission into Broadway Dance Center's professional summer semester, she decided she would accept, move to New York, and try to break into the musical theatre profession. So it started, the big move. First, the move back home for a month. Most of her "stuff" went into storage at the movers, but wow, these kids can accumulate a lot of "stuff". It's still everywhere in my house. We began planning for furnishing a teeny, tiny apartment in Manhattan. First, finding it. We took a trip, and an oh so nice broker helped us find a great place. Her old roommate from JMU planned to share the apartment, so they were looking for a one-bedroom convertible. Never heard of such a thing. I had lessons to learn. What they do, and I guess you New Yorkers know this, is they put a wall up in the living area and convert a one-bedroom into a two-bedroom. Yes, the rooms are tiny, but a two-bedroom apartment in Manhattan is more than most mortgages in our suburb. The one we liked would still have windows in all rooms, even with the wall going up, so we took a deep breath, signed over our left arm and our second child, and secured this apartment.

This is the living area before. Sorry for the blurry pictures, they were taken with my phone.
The wall went up quickly. I was horrified to learn that they don't tape and mud the seams, they just put a thin piece of wood over each seam. No matter, they will blend in once we paint. I also learned that the contractors won't paint any other color except white! So out came my paint brush. We added the window at the top to bring in the light from the window in the now created bedroom.
While the contractor was putting up the wall, I was painting my daughter's bedroom. I forgot to bring a step stool or ladder, so I painted as high as I could until the movers arrived. Once they came, I became the fastest painter you've ever seen! Paint color is a custom blend, sort of a pale pink/peach. Sorta like the color of pointe shoes.
This is the bedroom before, while waiting on the movers to arrive. Girls have so much "stuff"!
Cute shower curtain from Anthropologie in the bathroom.
Cute print of Central Park also in the bathroom.
We found this custom valance for the kitchen in a local consignment store.
I think from this picture you can get a feel for how small this apartment is. This is the hall coming into the apartment, kitchen is to the right.
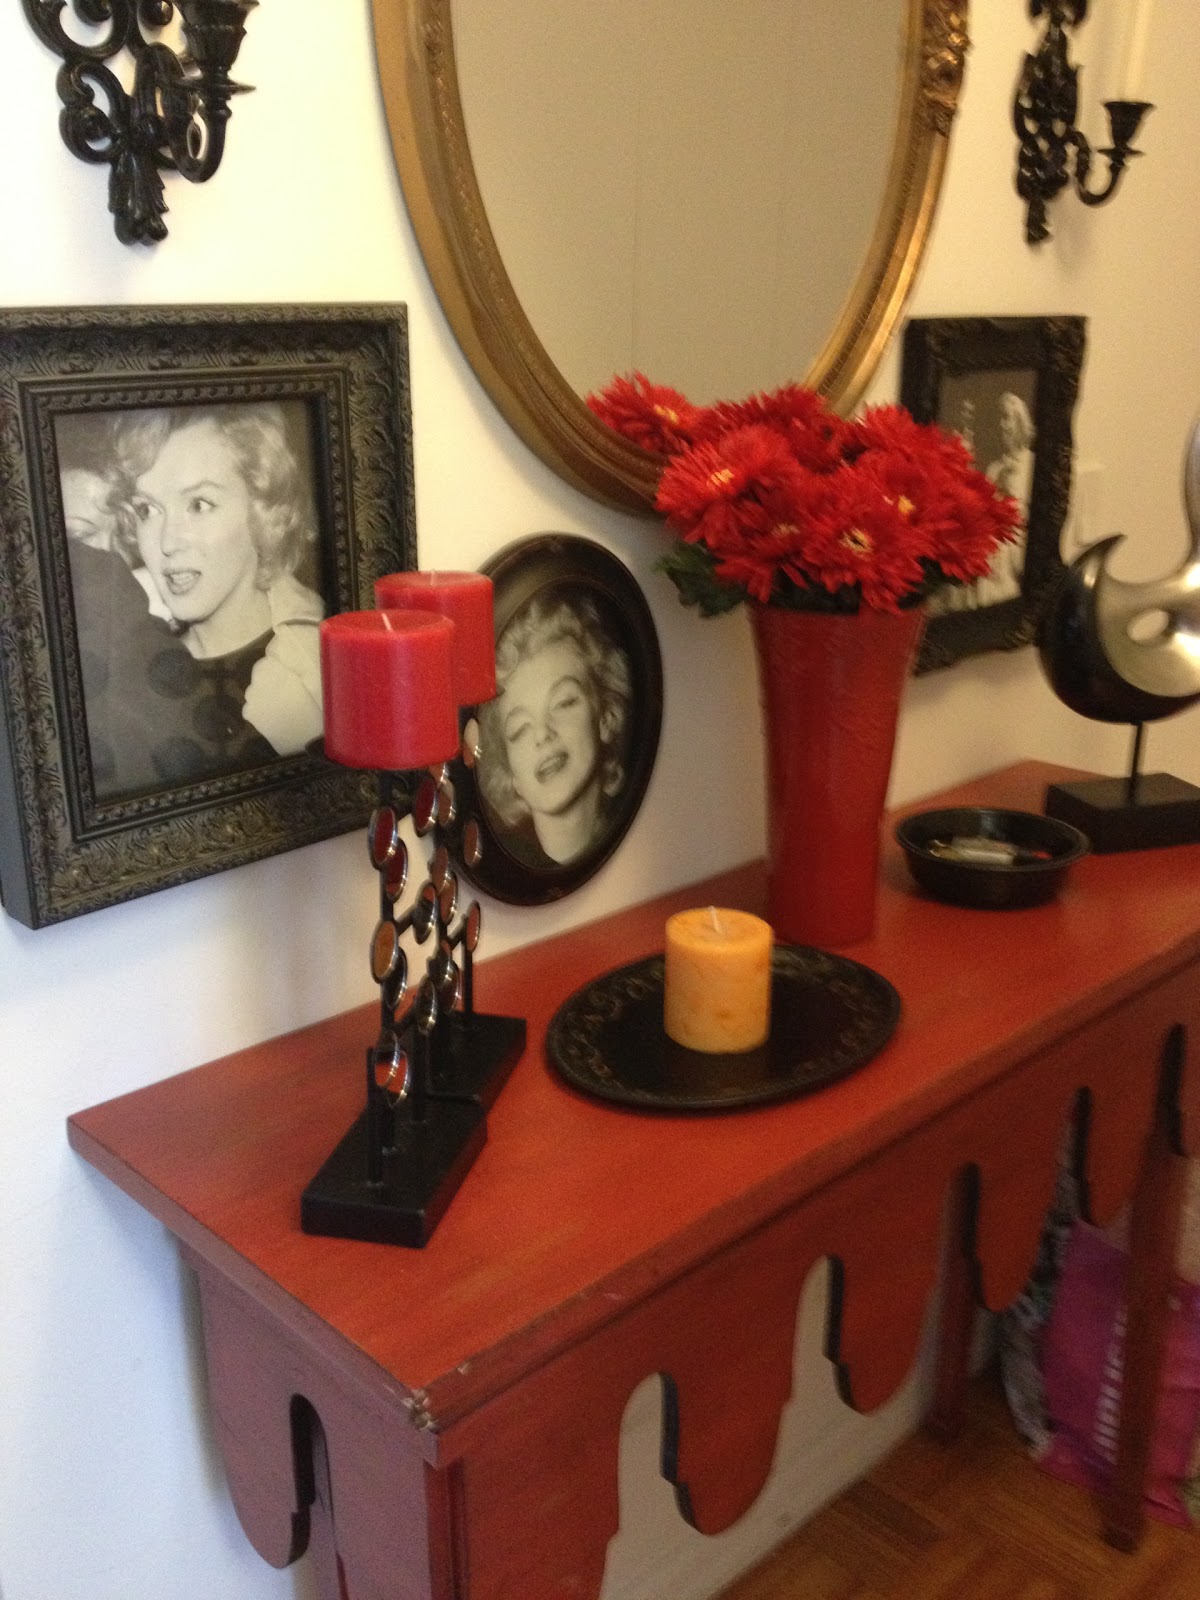
My daughter found these great pictures of Marilynn Monroe at the antique mall where I have my booth, so we framed them and did a little collage. Her red table wouldn't fit anywhere else in the apartment, and there's not a lot of room when you walk in, but it looks adorable. I think I'll take red candles for the sconces next time I go up. These are plastic sconces that I found at an estate sale, painted black!
The red table was purchased at a local design store a few years ago.
This is my daughter's little bar table. We had just enough room! The door to the right leads to my daughter's new bedroom and the door to the left is the roommate's new converted bedroom.
The spread color and curtain panels match the wall color. We found this great rug at Tuesday morning. Instead of a canopy cover, we used sheers purchased at Target for a little less than $5 each and shirred them on the cross pieces (whatever you call em lol). Since she was concerned with space, we used my bed I had growing up, which is a double. Oh and the pillow shams are Alice in Wonderland!
Double chest and mirror beside closet ...
Dresser and tv stand across from bed ...
--and her vanity and bookcase. We found this table made from an old Singer sewing machine, which we painted. It makes a great desk/vanity. The bookcase is tiny, perfect for the space, and we found it on Craigslist. The bulletin board was an old frame which held a mirror on a washstand or dresser. The mirror behind the door serves as her full-length mirror for getting dressed. Unfortunately, this was the only place we could find to put it!! But usually the door is closed when you are getting ready anyway!
Living area after. After painting the wall, adding curtain panels, and furniture, it turned out pretty cute.
We found a pair of these chairs at our antique mall, which we had re-covered in gray. They are vintage Hickory Chair. The rug was purchased at Tuesday morning.
Here is the wall, all completed. Can't really see the seams, but the window was a great idea to bring in extra light.
That's it, did you wonder why I didn't show pictures of a dining table? Well, they don't have one. The coffee table was important, because that is where they have to eat. I don't think they mind too much. Ramon noodles taste just as good on the couch as at a table.
Here are a couple of pictures of my daughter's roommate's room. We helped her find this gorgeous bed and vanity at an estate sale here in town. I wonder what she could get for it in NY city?
Can't really see all the detail because of the pillows, but this bed is beautiful.
The matching vanity is also gorgeous. She has no closet (remember, this was part of the living room), so she uses a rack purchased at Pottery Barn.
What I've learned helping my daughter decorate this apartment:
1. Monochromatic is the way to go. Stick to one basic color. We used grays in the living area, with red and orange pillows and accessories to add interest. The pale peach/pink in the bedroom softened the room and made it cozy.
2. Painting the convertible wall an accent color is a good idea visually, and once you move out, the wall is removed and you don't have to paint over it.
3. A glass coffee table allows you to "see-through" which makes the space look a bit larger.
4. Look for an apartment that will allow you to have windows in all spaces, if you must convert.
5. Save your money, it is sooooo expensive to live in Manhattan. My daughter's old apartment in Richmond was 2800 square feet, and with 3 roommates she paid only $620 a month. Our broker in NY told us that apartment in NY city would go for $12,000 a month! She is paying considerably more than that now for approximately 700-730 square feet.
After a teary goodbye, we drove home feeling a bit down in the dumps. Happy and excited for her, but sad that she's so far away. We were spoiled with her living so close by for the last two years. She's having a great time, and she was even on a local NY tv station this week, doing a soul train dance! Before she moved, we all went to the Bahamas for our family vacation. We will be visiting her the beginning of August, and attending the showcase for Broadway Dance Center's professional summer semester.
Having fun in the Bahamas!
My little girl--hoping to one day sing and dance on the big stage!! Regardless of what happens, it will be a great experience, one she will never forget!
Thanks for visiting today, sorry for the length of this post. See you soon!!


 The dining room table gets a new runner from Marshalls and
 I can't always take this decorating stuff too seriously, so when I saw these legs with fishnet hose and leopard shoes, I just knew they were coming home with me.